

Key Takeaways
- Emptying and sorting everything first prevents you from organizing around items you no longer need.
- Shelf risers and stackable bins double usable vertical space inside the cabinet.
- Plumbing pipes and the garbage disposal limit placement options, so measure before buying organizers.
- Grouping items by task keeps the cabinet intuitive for everyone in the household.
- A monthly check prevents the cabinet from reverting to clutter within weeks.
What you will need
Why this space gets ignored
The cabinet under a sink is one of the most awkward storage spaces in any home. Pipes cut through the middle of it, the depth can be hard to reach into, and the height is rarely uniform. Most people slide a few things in there and close the door.
The result is a space that fills up with expired products, duplicate purchases bought because the originals could not be found, and items that simply have no other home. The same pattern that breaks down kitchen drawer organization applies here: without a deliberate system, the space defaults to a dumping ground.
The good news is that the cabinet's limitations are predictable. Pipes are always in roughly the same position relative to the sink. The depth is fixed. Once you account for those constraints, the remaining space is more useful than it looks, and the tools to organize it are inexpensive.
Tape measure
Measure cabinet interior dimensions so organizers fit around pipes and the cabinet walls.
Stackable bins or clear containers
Group like items together and make contents visible without removing everything.
Shelf riser or tension shelf
Create a second level inside the cabinet to use vertical space above short items.
Lazy Susan turntable
Allows easy access to bottles stored at the back of a deep cabinet.
Over-the-door organizer or adhesive hooks
Mount to the inside of the cabinet door to hold small items, sprays, or gloves.
Labels and a marker
Identify bins so household members can find and return items without searching.
How to organize it step by step
Before buying any organizer, empty the cabinet and measure it. This step is the one most people skip, and it is why bins bought at a store often do not fit around the plumbing. The steps below walk you through the full process, from clearing out to maintaining the system over time.
What you will need
Empty the cabinet completely
Pull out every item and place it on the floor or a nearby surface where you can see it all at once. This includes anything pushed to the back, items balanced on top of the pipes, and forgotten products underneath the drain. You cannot assess what you have or plan a layout while things are still inside.
Sort and discard
Check expiration dates on cleaning products, medications stored here by mistake, and personal care items. Dispose of anything expired, empty, or that you have not used in over a year. Wipe down bottles that have leaked or collected grime before setting them aside to return.
Measure the interior and note obstacles
Use a tape measure to record the cabinet's width, depth, and height. Note where the drain pipe, supply lines, and (in kitchens) the garbage disposal sit. These obstacles divide the usable space into zones, and any organizer you buy must work around them. Sketch a rough diagram if it helps.
Wipe down the interior
Before putting anything back, clean the cabinet floor and walls with a damp cloth. If there is a water stain or soft spot on the cabinet floor, inspect the supply lines and drain for slow leaks before proceeding. A small drip left unaddressed will damage any organizers you install and is worth fixing now.
Group items by task and assign zones
Divide what you kept into logical groups: daily-use items (soap refills, sponges), cleaning products, backup stock, and anything else specific to your household. Assign each group a position inside the cabinet based on how often you reach for it. Daily items go at the front; backup stock sits at the back or on a higher shelf.
Install organizers and place items
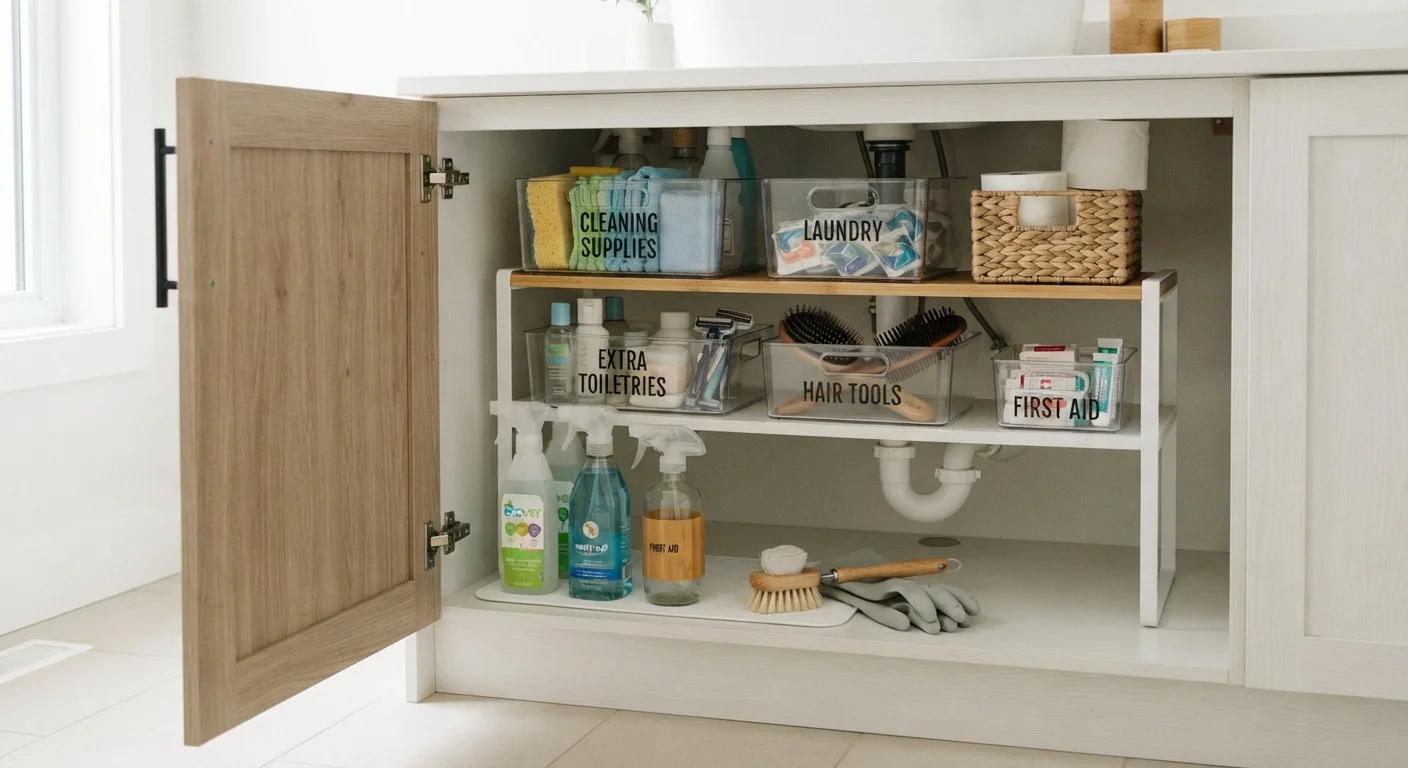
Place a shelf riser on one side of the cabinet to create an upper and lower level for shorter bottles. Use a lazy Susan at the back for tall spray bottles in deep cabinets. Slide stackable bins into the front zones. Hang an over-the-door organizer on the cabinet door for rubber gloves, small brushes, or a roll of paper towels. Place items into their assigned zones.
Label bins and establish a reset habit
Label each bin or zone clearly, even if it seems obvious now. Labels make the system work for everyone in the household, not just the person who set it up. Plan a quick monthly check (two to three minutes) to discard empties, return misplaced items, and confirm nothing is leaking.
If you are also working on other areas of the bathroom, the approach here pairs well with targeted bathroom upgrades that make compact rooms feel more functional overall.
What to do when vertical space is still limited
Some under-sink cabinets, particularly older vanities, have very little clearance even after organizing. If a shelf riser does not help enough, the inside of the cabinet door becomes the most practical expansion point. Adhesive hooks or a slim over-the-door rack can hold spray bottles, cleaning cloths, or a small caddy without taking up any floor space inside the cabinet.
The cabinet door is also worth considering for items that need to be within easy reach but are awkward to store flat, such as rubber gloves or a toilet brush. For a broader look at how this principle applies across the home, the guide to using vertical space for organization covers door-mounted, wall-mounted, and ceiling-height approaches in every room.
In kitchens, the garbage disposal takes up a significant portion of the cabinet. A pull-out organizer that fits around the disposal housing on one side and the open space on the other is often the most practical solution for that layout. Measure the gap beside the disposal carefully before purchasing.