

Key Takeaways
- Swapping a vanity light fixture is one of the highest-impact, lowest-cost bathroom upgrades available.
- A large mirror or a framed one transforms perceived space without touching the floor plan.
- Grout color and caulk condition affect the entire tone of a bathroom more than most people expect.
- Vertical storage solutions recover usable space in rooms where floor area is limited.
- Hardware changes on cabinets and fixtures deliver a noticeable visual refresh for minimal investment.
Why small bathrooms respond so well to targeted changes
Compact bathrooms have one underappreciated advantage: every surface is within arm's reach. That proximity means a single upgraded element, a new light fixture, a regrouted tile wall, or a replaced faucet, registers across the whole room immediately. There is nowhere to hide a weak detail, but there is also nowhere to hide a good one.
The upgrades in this list focus on visual weight, light, and proportion rather than square footage. None require moving plumbing or opening walls. Most can be completed over a weekend, and several cost under $100 in materials. For readers who want to extend the same thinking beyond the bathroom, weekend room transformation projects covers comparable approaches for other spaces in the home.
Start with what you see first
When budgeting upgrades, prioritize whatever your eye lands on when you open the bathroom door. In most small bathrooms, that is the mirror, the vanity light, and the floor or tile. Improving that first impression creates a halo effect that makes the rest of the room look better before you touch it.
Upgrades worth doing in a small bathroom
Replace the vanity light with something closer to daylight
Most builder-grade vanity fixtures cast a warm, uneven light that flattens surfaces and makes grout lines look dingier than they are. Replacing the fixture with one that uses bulbs rated between 2700K and 3000K color temperature gives the room a cleaner, more open feel without any structural change.
Choose a fixture that positions bulbs on both sides of the mirror or directly above it at a comfortable height. Side-mounted sconces reduce the facial shadows that a single overhead bar creates, which also makes the space feel less cave-like. Electrical work for a fixture swap is within reach of a confident DIYer, but if your home has older wiring or the junction box needs repositioning, a licensed electrician is the right call. See strategies for improving light in any room for complementary ideas about natural light.
The right bulb color temperature can make tile and grout look cleaner without touching them.
Size up the mirror
A mirror that runs closer to the full width of the vanity, or extends nearly to the ceiling, reflects more light and visually doubles the sense of depth in the room. Many small bathrooms have a small medicine cabinet or a modestly sized framed mirror that cuts the wall into segments, which reads as cramped.
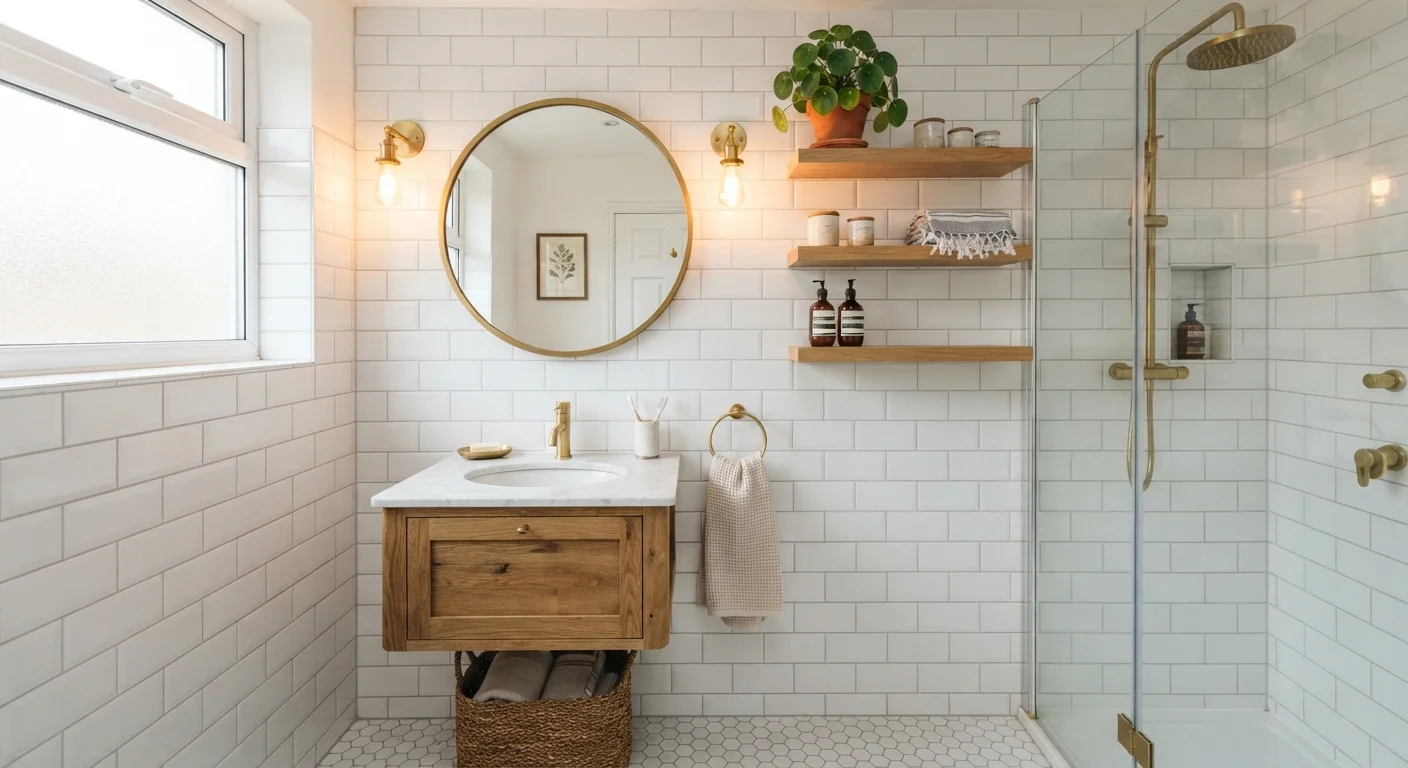
A frameless mirror or one with a thin metal frame in a warm finish (matte black, brushed gold, brushed nickel) gives the wall an unbroken horizontal line that reads as width. If storage is a concern, recessed medicine cabinets are available in wider formats that can replace a small mirror without adding projection into the room.
A mirror sized to the full vanity width can make a bathroom feel nearly twice as open.
Regrout and recaulk
Discolored grout is the single element that ages a bathroom faster than anything else. Fresh grout lines, especially in a lighter color or a clean white, reset the visual baseline of the entire room. Regrouting is labor-intensive but not technically complex: remove old grout with a grout saw or oscillating tool, apply new grout, seal it, and let it cure.
Recaulking the tub-to-tile seam and around the vanity base is even faster and has a comparably large effect. Old caulk that has yellowed, cracked, or grown mold changes the perception of the whole room. Fresh caulk in a matching color takes an afternoon and costs very little.
Fresh grout lines reset how clean a bathroom looks, regardless of how old the tile is.
Swap out cabinet and drawer hardware
Pulls and knobs are some of the smallest components in a bathroom, but a cohesive hardware finish ties the vanity, towel bar, toilet paper holder, and light fixture into a single visual language. If those elements are currently a mix of chrome, brushed nickel, and oil-rubbed bronze from different eras, the room looks unfinished even when everything is technically functional.
Picking one metal finish and replacing all hardware at once takes a few hours with a screwdriver. The cost is modest, and the effect is a room that looks considered rather than assembled over time. Matte black and warm brass are currently common in updated bathrooms, but the specific finish matters less than consistency across pieces.
Matching hardware finish across all fixtures makes a bathroom look intentionally designed.
Add vertical storage to reclaim floor space
Floor-mounted storage in a small bathroom competes with the room itself. A narrow ladder shelf, a wall-mounted cabinet above the toilet, or a recessed niche in the shower wall moves storage up and off the floor, which makes the footprint read as larger.
Above-toilet units are widely available in multiple heights and can be anchored to studs without professional installation. For the shower, a corner tension caddy keeps products off the floor and tub edge. If you want to extend vertical thinking through the rest of your home, this guide to vertical space organization covers the approach room by room.
Moving storage off the floor and onto walls is the fastest way to open up a small bathroom.
Replace the faucet and showerhead
A faucet with a high arc or a waterfall spout draws the eye upward, which helps a low vanity read as taller. Replacing a dated single-handle faucet with a current design in a finish that matches your other hardware is a straightforward DIY task with shutoff valves and basic hand tools.
A new showerhead has a similar effect in the shower zone. Many current models have a cleaner, more minimal profile than older versions, which reduces visual clutter on the wall. Neither swap requires moving supply lines, so the job typically takes under two hours per fixture.
A high-arc faucet draws the eye upward, adding a sense of height to a low vanity.
Putting it all together
None of these upgrades requires a contractor, a permit, or a gutted budget. The most effective sequence is to start with lighting and the mirror, since both affect how every other surface reads. Then move to grout, hardware, and storage. Each layer builds on the last, and the cumulative result tends to feel like a much larger renovation than the individual steps suggest.
Storage is often the final piece. If under-sink space is part of your plan, organizing the cabinet under your sink offers practical methods for that often-overlooked area. For the walls and door behind you, using vertical space throughout the home applies the same logic at a room-wide scale.